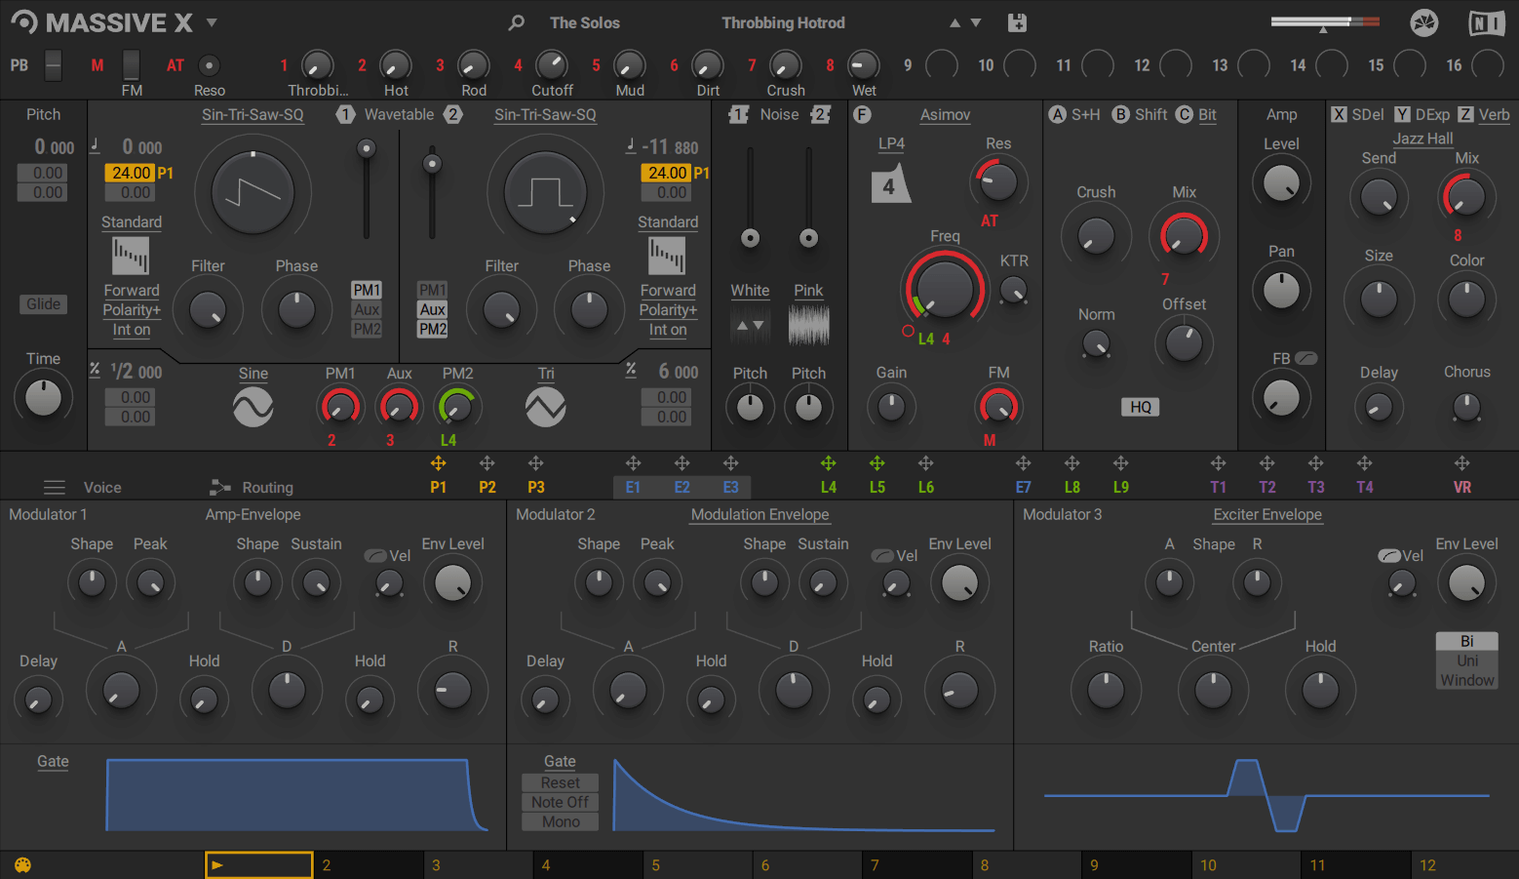
Massive X is a polyphonic wavetable synthesizer that loads into a DAW track as a VST, VST3, AU, or AAX instrument plugin—it never runs standalone.
A session path through Massive X
- Arm an instrument track. Insert Massive X on a MIDI track in your DAW. It coexists with the original Massive, so older projects open without a hitch while new sessions pull from over 170 wavetable options and a factory library of 780 presets.
- Find a wavetable starting point. Browse the wavetable index and pick a tonal foundation. The oscillator section gives you shaping controls that respond well to subtle movement, which is where the next step comes in.
- Draw modulation in the Performer section. Here you can sketch custom modulation patterns and route them to almost any parameter—filter cutoff, wavetable position, effects sends. The drawn curves turn static patches into evolving textures that shift across a phrase.
- Route it through a bus. Send the instrument track to a reverb or delay bus for depth, or mult the output to a parallel processing chain. Because Massive X sits inside a DAW as a plugin, it slots into whatever routing scheme your session already uses.
The synth lands as a sound-design instrument on a track, fed by MIDI, shaped by drawn modulation, and sent outward through buses the same way any other plugin instrument would. It does not stand alone—it waits for a session to give it context.
The wavetable position knob is not a volume control
A pattern I see often: loading Massive X onto a track, calling up a preset, playing a few chords, and deciding the synth sounds too aggressive or too cold. The wavetable position knob is not a volume control, yet newcomers twist it the same way—crank it fully clockwise, hear something harsh, and move on. Wavetable position works more like a filter sweep through a three-dimensional sound snapshot. Half the character lives in the middle zones where two adjacent waveforms blend. Another common slip: ignoring the Performer section entirely for the first few weeks. It sits there in the interface looking like a sequencer, so people tab past it, when it is actually the fastest route to making a patch feel alive. Draw a single slow curve, route it to wavetable position at around twenty percent depth, and suddenly a static lead breathes.
Beginners also underestimate the routing matrix. The panel is dense and not especially welcoming at a glance—rows of source and destination slots with small dropdown menus—so the instinct is to leave everything at default signal paths. That works, but it means missing the phase modulation generators and the ability to send one oscillator's output into another's modulation input. The synth rewards even one deliberate reroute. Finally, there is the tendency to stack multiple instances across a session without realizing how much CPU each one pulls when the oscillator section runs at high quality modes. A single instance with complex modulation and both phase modulators engaged can eat a surprising chunk of a core. Bouncing to audio early keeps a session moving.
Stop scrolling through 780 presets by tagging favourites early
Organize a favourites folder immediately. The factory library holds 780 presets, which is a lot of scrolling when you are trying to find that one bass sound you liked twenty minutes ago. Tag presets you respond to—pads with slow wavetable movement, plucks with tight Performer curves, sub-bass patches that sit well in a mix—so they are one click away during the first writing sessions. This small habit pays off within the first evening.
Spend an hour with the Performer section and nothing else. Load a simple sawtooth wavetable, strip off the effects, and draw three different modulation shapes: a slow sine-like curve routed to filter cutoff, a rhythmic staircase pattern routed to wavetable position, and an erratic freehand line routed to an insert effect parameter. Play a held chord and listen to what each curve does to the sound. Understanding the Performer as a modulation source, not a sequencer, changes how you approach patch design from then on. The Remote Octave control lets you trigger Performer patterns from keyboard keys, so you can switch modulation shapes mid-phrase without touching the mouse.
Check your DAW's plugin delay compensation behaviour. Massive X can introduce latency depending on the patch complexity and your buffer size. Some DAWs handle this transparently; others require a quick settings check. If you notice timing drift on a track with heavy modulation routing, freeze or bounce the part and check it against the grid before building more layers around it.
A synth that rewards connecting sources to unexpected destinations
Sound designers who build patches from an initialized state thrive with Massive X. The oscillator section and routing matrix reward someone who enjoys connecting a source to an unexpected destination and hearing what happens. If your workflow involves creating a library of custom sounds for a film, a game, or a sample pack, the synth gives you a deep well to draw from—170 wavetable options multiplied by ten playback modes and two phase modulation generators yields an enormous combinatorial space before you even touch the filters or effects.
Composers working on long-form projects benefit from the modulation engine's ability to stretch a single note into something that evolves over eight or sixteen bars. A drone patch with slow Performer curves routed to multiple parameters can replace three or four layered tracks of orchestral or textural elements in a cue, which matters when a deadline is close. Producers who lean into electronic and hybrid genres—ranging from downtempo to industrial to cinematic bass music—find the core tone sits in the right part of the spectrum without much post-processing. The raw oscillator output has a weight and presence that works in dense mixes where thinner synths get buried.
Keyboard players who perform rather than program also get mileage from Massive X, especially those comfortable assigning macro controls. Map wavetable position, filter cutoff, and an insert parameter to a MIDI controller's knobs or faders, and the synth becomes an expressive live instrument rather than a preset machine. The polyphony handles sustained chords with movement across the stereo field, and the routing flexibility means you can set up splits and layers within a single instance if your DAW supports multi-timbral routing.
A workflow for designing a rhythmic bass patch from scratch
- Initialize the patch. Open a fresh instance of Massive X and clear the default routing. Select a basic wavetable—something with a strong fundamental, like a sawtooth variant from the factory index set to a standard playback mode. Disable the effects section for now.
- Shape the oscillator. Set the wavetable position to roughly thirty percent and adjust the oscillator's tuning and unison settings. Two or three voices with slight detuning add width without muddying the low end. Keep the phase modulation generators bypassed at this stage.
- Build a Performer modulation curve. Switch to the Performer section and draw a rhythmic pattern—four steps, with the first and third steps high and the second and fourth low. Route this curve to the filter cutoff at around forty percent modulation depth. The bass now pumps in time with the Performer steps.
- Add a second modulation lane. In a new Performer lane, draw a slower descending curve and route it gently to wavetable position. This introduces a subtle timbral shift across the bar, so each hit of the pattern sounds slightly different from the last.
- Route through the filters. Engage one of the insert filters and set it to a low-pass or comb type. Patch the Performer curves through the routing matrix so the rhythmic curve hits the filter cutoff and the slow curve hits resonance. Balance the modulation depths until the movement feels musical rather than mechanical.
- Bring in the effects. Add a touch of saturation from the insert section to give the bass presence in the midrange, then enable a small-room reverb with a short decay. Dial the wet mix low—just enough to place the sound in a space without washing out the transients.
- Assign Remote Octave triggers. Map two Performer snapshots to adjacent keys in the Remote Octave range. One snapshot uses the rhythmic cutoff pattern; the other switches to a slower, wider modulation curve for breakdown sections. You can now switch the bass behaviour by pressing a key rather than loading a separate patch.
- Save and bounce. Save the patch to your user library with a descriptive name. Play a few bars of the bassline, bounce the audio, and check the waveform for consistent peaks. If the modulation pushes certain notes louder than others, adjust the Performer depth slightly and re-bounce.
The resulting patch moves. It does not sit flat in a mix—it pushes and breathes with the rhythm of the track, and it was built from an initialized state using only the tools inside Massive X. That kind of sound is why people keep coming back to this synth, whether they grab a massive mac crack from a trusted source or pull it from a massive torrent collection that includes the full KOMPLETE lineup. A massive x torrent floating around production circles often includes version 1.7.1 with the same factory content described here, and once the massive vst torrent lands on your Mac, the synth installs as a standard plugin across AU, VST3, and AAX formats—no standalone mode, just an instrument waiting on a DAW track.
Version 1.7.1 is the most recent update listed for Massive X.
- macOS 13 or later
- Apple Silicon or Intel processor (Intel Macs require AVX support)
- 4 GB RAM (6 GB recommended)
- OpenGL 2.1 or higher, or DirectX 9/11 graphics for download and activation
- Internet connection for download and activation
Questions from the booth
No, the two coexist. You can keep Massive installed for older DAW projects and still reach for Massive X as a different instrument with its own engine and preset library.
No, it runs only as a plugin—VST, VST3, AU, or AAX—inside a host application. There is no standalone version.