Two wavetable oscillators. That is the core of Serum, and from that starting point it expands into a synthesizer that feels more like a living instrument than a collection of dials. Version 2 keeps the wavetable engine that made the original a staple and layers in a new set of filters borrowed from Xfer's own LFOTool, alongside flangers, phasers, and comb filters that can track the notes you play. A low C triggers a different resonant sweep than a high F, because the effect follows the pitch, not just the tempo.
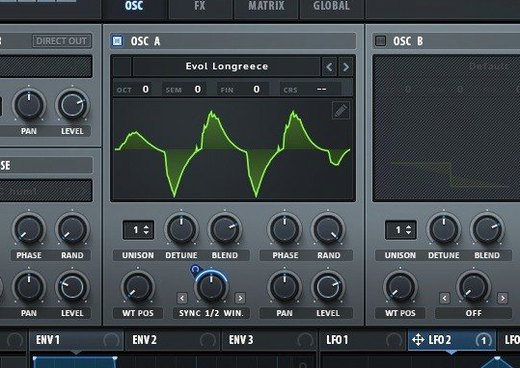
- Find a starting waveform. Load one from the wavetable menu or import your own audio. The display shows the waveform in real time, so you see what the modulation is doing before you hear it.
- Stack the oscillators. Use the stack settings to layer octaves or intervals with one key press. A single note can push air like a chord without writing one.
- Warp the unison. Each oscillator has advanced unison parameters. Unison Warp lets you set each voice differently; Unison WT Pos assigns a distinct waveform to every unison voice at once, turning a simple sawtooth into a shifting, multi-timbral texture.
- Shape with filters. Drop in a comb filter set to track the keyboard, or push a sample-rate reduction as a filter process for lo-fi grit that moves with the music.
- Modulate everything. Drag a modulator to any parameter and the sound starts breathing. The system is deep enough to animate a filter cutoff with a chaotic LFO while another slowly detunes the unison spread.
Serum 2 is for the producer who pulls a sound apart to understand it, then puts it back together differently. It rewards the kind of patience that turns an afternoon into a folder of presets you actually use.
Right-click shortcuts and modifier keys hiding in plain sight
Some of Serum's best features are tucked behind a right-click or a modifier key, the kind of things you stumble across a year in and wonder how you worked without them. Dragging a modulation source to a parameter is the obvious route, but holding Command while dragging bypasses the mod matrix entirely and sets the modulation amount to 50% instantly. Fine for quick experiments when you do not want to commit to a full routing.
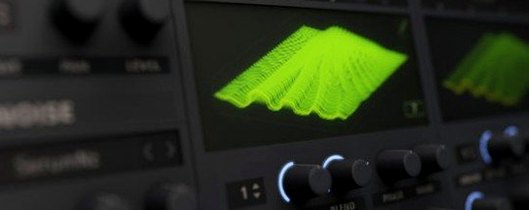
The wavetable display is not just for looking at. Click and drag directly on the 3D waveform view to scroll through wavetable positions, and Option-click a knob to reset it to its default value without hunting through menus. If you work with a lot of imported audio, the wavetable editor accepts drag-and-drop from Finder — pull a sample straight onto the oscillator and Serum maps it across the table in one motion. No import dialogue, no browsing.
The filter section has a quieter trick. When you have two filters running in series or parallel, hold Shift while adjusting the cutoff of one and both move together. Useful when you are shaping a band-pass response and want to keep the relationship between the two filters intact while sweeping the frequency range. The mod matrix itself supports copy and paste: right-click any slot to duplicate its routing to another destination, saving you from re-dialling the same LFO curve across four different targets.
The silent patch culprit: sustain at zero or a nudged master volume
The most common one is loading Serum and hearing nothing, then assuming something is broken. Nine times out of ten the amplifier envelope's sustain node is sitting at zero, or the master volume knob got nudged down while navigating the interface. Serum's default patch is not a playable sound — it is a blank canvas — and that catches people coming from ROMplers or sample libraries who expect an init patch to produce a tone.
Another early pitfall is piling on unison voices without adjusting the detune spread. Sixteen voices stacked with a detune of zero just phase against each other and sound thinner than a single voice. The Unison Warp and Unison WT Pos controls are powerful, but they need some width to breathe; start with a detune of 0.15 or so and nudge up from there, or the oscillator sounds like it is cancelling itself out.
People also overlook the fact that Serum's filters are per-voice by default, not applied globally after the summing stage. If you are running a patch with heavy unison and a resonant filter, each voice gets its own filter instance, which can make the resonance pile up fast and clip the output. Toggling a filter to process the summed signal instead — when the routing allows — tames the buildup and keeps the low end from turning into a wall of mud.
Beginners sometimes drag an LFO onto a parameter and hear wild movement they did not intend, then delete the routing instead of checking the LFO's depth first. The modulation system shows the amount in real time on the destination knob with a small animated ring; watching that ring tells you exactly how much the parameter is moving before you touch anything else.
Apple Silicon support without Rosetta is already built in
The question of whether Serum runs natively on Apple Silicon comes up constantly, and the answer is yes — the current build supports both ARM and x86 64-bit Macs, so no Rosetta translation layer is required. People on older machines often ask about the macOS floor, and Serum 2 asks for macOS 10.13 or later, which keeps it accessible to producers holding onto pre-Catalina setups for plugin compatibility. The installer handles the standard plugin paths for VST3 and Audio Unit, and the included instructions file walks through the activation steps plainly.
Another common question is whether Serum can load custom wavetables from other synthesizers or sample editors. It can import single-cycle waveforms as WAV files and will interpolate them across the wavetable smoothly, though the quality of the result depends on how clean the source cycles are. The wavetable editor includes tools for crossfading, normalising, and trimming, so even rough imports can be shaped into something usable with a few minutes of work.
Producers coming from hardware often want to know how the filters compare to analog circuits. The new filter types pulled from LFOTool are digital by design and do not pretend to model specific vintage units; they are precise, clean, and useful for surgical shaping, with the comb and sample-rate reduction filters adding texture that analog emulations rarely touch. People looking for Serum free download results sometimes assume the feature set is cut down compared to the full release, but the build described here includes the complete wavetable engine, all filter types, and the full modulation system.
When a fat preset disappears against your kick and bassline
A patch that sounds enormous in isolation can vanish the moment it sits in a mix with a kick drum and a bassline. This is not a Serum problem so much as a mixing one, but the fix starts inside the synth. The sub-oscillator level often needs to come down further than you think once other low-end elements enter the arrangement, and the filter envelope's attack can be shortened to let the transient of the note poke through before the body of the sound swells.
CPU spikes with complex patches are another frequent headache. Serum's oscillators are calculated per-voice, and a 16-voice unison patch with two oscillators, dual filters, and four active modulators can push even an M-series chip into crackling territory at low buffer sizes. The workaround is to reduce the unison voice count during composition and only crank it up when you are ready to bounce to audio. The oscillator quality setting — accessible from the global menu — also gives you a draft mode that lowers the internal rendering precision and recovers a surprising amount of headroom.
Some users report that the plugin window appears blank or fails to scan in their DAW after installation. This is almost always a permissions issue on newer macOS versions, where the system blocks unsigned or newly installed plugin files until they are explicitly allowed. Running the DAW once with reduced security settings, or manually approving the component file in System Preferences under Security & Privacy, resolves it within a few minutes. The included VR.nfo file documents this step and others in detail.
Change the master tuning reference before you design a single sound
The first thing to adjust is the master tuning reference, found under the global settings tab. Serum defaults to A4 at 440 Hz, but if you collaborate with producers who work at 432 Hz or need to match the pitch of an old sample that drifts slightly flat, changing this now saves you from retuning every patch later. The global bend range, set to two semitones by default, is another one worth expanding if you work with pitch-wheel-heavy performance styles — setting it to twelve semitones gives you full octave sweeps without per-patch adjustments.
The voice limit and polyphony mode deserve attention early. Serum defaults to eight-voice polyphony, which is sensible for most patches, but monophonic leads benefit from switching to mono mode with legato enabled and the portamento time set to taste. The glide curve — logarithmic versus linear — changes the character of the slide more than the speed, and logarithmic tends to sound more natural on bass patches where the transition between notes should feel like a bend, not a ramp.
Finally, set the default wavetable resolution in the preferences to match your working style. The high-resolution mode interpolates more smoothly at the cost of CPU, while the standard mode is perfectly usable for sound design sessions where you are auditioning dozens of ideas quickly. You can always switch a finished patch to high resolution before bouncing, but starting in standard mode keeps the creative flow uninterrupted when you are dragging modulators around and trying things that might not stick.
Version 2.0.24 is a maintenance release that smooths over a handful of host-specific rough edges while adding a couple of thoughtful workflow concessions. A new Ignore VST3 Note IDs toggle helps sidestep note-identifier quirks in certain DAWs, and Pro Tools users gain support for automatable parameter shortcuts. On the fix side, projects and sessions created in newer Serum 2 builds no longer lose data when opened, pop-up tooltips behave in Digital Performer, and several intermittent crashes in that host have been quelled. ACIDized WAV files with empty strc blocks now load correctly, Clip Player macro automation updates properly in Bitwig Studio, and MPE values persist after voice stealing instead of silently dropping. The Piano Roll note preview finally respects the velocity of the note you’re auditioning. A malformed-data crash path into the Serum processor has been closed, the preferences interface — broken since 2.0.22 — is restored, and the Previous/Next preset buttons no longer leap absurdly to ARP — Aardvark after loading a session. Windows users get a fix for a Pro Tools shutdown hang, and JUCE-based hosts using non-100% display scaling now render the interface at the correct size.
- macOS 10.13 or later
- Apple Silicon or Intel 64-bit
Questions from the booth
Serum is a wavetable synthesizer — it generates sound by cycling through a table of single-cycle waveforms, letting you morph between different timbres in real time.