
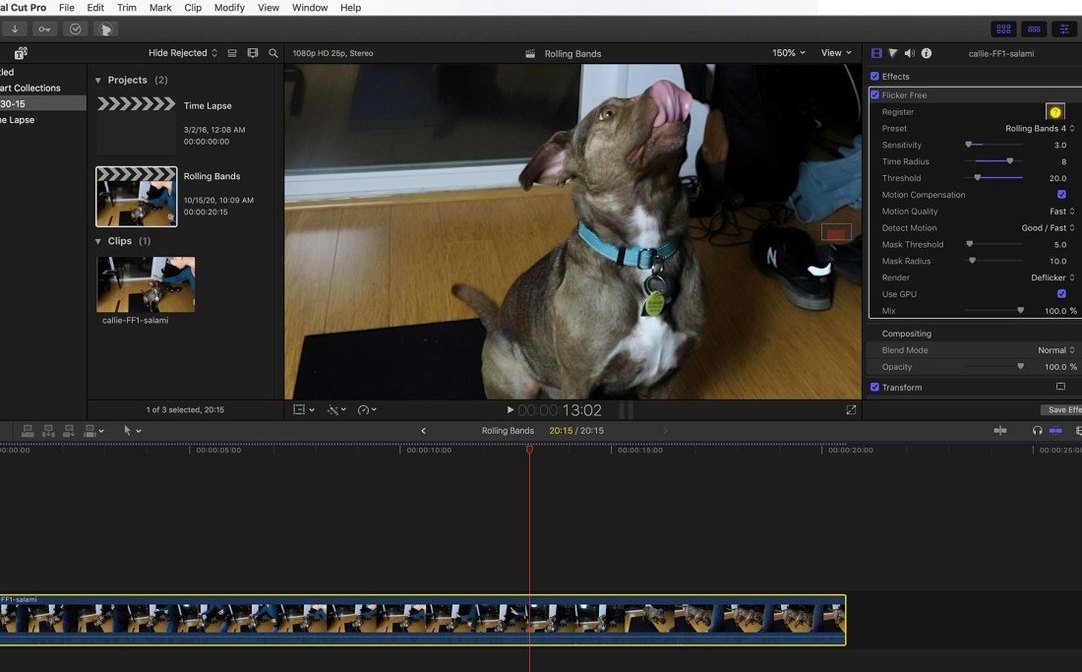
You have a locked-off time-lapse of a city street at dusk, and the office tower on the left strobes through its entire fluorescent spectrum. Or a 120fps slow-motion take where a computer monitor pulses in the background like a heartbeat you never asked for. That rolling band of light is a sync problem between the camera’s shutter and the electricity cycling through the lamp — and built-in editor tools rarely touch it.
Formats, hosts and where it fits
Flicker Free 2.1.6 runs on Apple Silicon and Intel Macs as a third-party plugin, which means it slots into your existing timeline in After Effects, Premiere Pro, Final Cut Pro, DaVinci Resolve and several other NLEs and compositors. It arrives ready to analyze frames during processing, targeting flicker from fluorescent tubes, cheap LED dimmers and mismatched monitor refresh rates — the three culprits that turn an otherwise clean shot into something that looks like a faulty newsreel.
Drop, match, and test in three steps
- Drop the effect onto the problem clip in your timeline.
- Pick a preset that matches your source — fluorescent, LED, monitor or time-lapse — rather than building settings from scratch.
- Render a short test segment around the worst flicker frames. The analysis runs during this pass, so you can judge the correction without committing to the full clip.
- Once the test looks solid, apply it to the whole shot and move on. The preset-driven approach keeps you from chasing sliders while the deadline creeps up.
High-frame-rate material and time-lapse sequences benefit most, because the strobing that hides in real-time playback becomes glaring once you slow things down or compress hours into seconds. The plugin works on the frames themselves — it is not a blur pass disguised as repair — so fine detail in the flickering areas stays intact when the band disappears.
The first 48 hours with the plugin
When the download finishes and the plugin sits in your effects library, resist the impulse to throw it at your worst flickering clip straight away. Grab a five-second segment of something moderately bad — fluorescent office footage is ideal — and work through each preset methodically. The Fluorescent preset handles 50Hz and 60Hz mains-driven flicker with different internal defaults, so knowing your footage’s country of origin saves you a round of trial and error. Render a short preview after each test and watch the waveform monitor, not just the image. A correction that looks smooth on screen can still leave a rhythmic dip in luminance that the scopes will catch before the client does.
One habit worth forming early: apply Flicker Free before any colour grade or LUT. The plugin reads pixel values to detect the flicker pattern, and a crushed blacks grade upstream can trick the analysis into missing subtle pulsing in the shadows. If you have already graded the clip, duplicate the layer, strip the grade from the lower copy, apply the deflicker there, and let the adjustment layers sit above.
Why the wrong preset turns a sunset into a ghost
The most common frustration comes from leaving the preset at its default when the footage does not match it. A time-lapse shot of a sunset processed through the LED preset produces a ghostly smoothing that looks like a bad noise reduction pass — the algorithm is hunting for a rolling band that is not there. Switch to the Time Lapse preset and the same clip settles into an even exposure curve within seconds.
Another frequent hitch: applying the plugin to a clip that has already been speed-ramped or reinterpreted at a different frame rate. Flicker Free analyzes the frames in timeline order, so if you have reinterpreted 60fps footage to 24fps inside the NLE, the temporal spacing confuses the detection. Bounce the clip to a ProRes master at the original frame rate, deflicker that file, then bring it back for the speed change. The extra render pass is tedious, but the alternative is a correction that overshoots every third frame.
On Macs with Apple Silicon, the plugin runs natively, but some users report a brief beachball on the first analysis pass after a cold launch. This is the system caching the Metal shaders, not a crash. Let it finish — subsequent passes on the same session run at full speed. If you are on an Intel machine and working with 6K or 8K RED footage, split the clip into shorter segments for the analysis pass. Processing a twenty-minute interview in one go can exhaust available memory and slow the render to a crawl.
Deflickering a monitor in a talking-head shot, end to end
You have a three-minute interview where the subject sits in front of a display showing a looping product reel. The monitor pulses with a slow horizontal roll that was invisible on set but screams at you in the edit suite. Here is the fix from first frame to final export.
First, isolate the problem: scrub through the clip and mark an in and out point around a ten-second stretch where the roll is most visible. Drop Flicker Free onto the clip and select the Monitor preset. The preset sets the analysis to look for fixed-frequency banding rather than the irregular shimmer of a dimmed LED, which is what separates a screen flicker from a lighting flicker in the plugin’s logic.
Render that ten-second test and watch it at full resolution. If the roll is gone but the subject’s skin tones have shifted slightly — a rare side effect when the monitor light was contributing to the key — open the effect controls and dial back the Amount slider to around 80%. The banding should stay invisible while the colour cast returns to neutral. If a faint ghost of the roll remains in the bottom third of the frame, increase the Detection Threshold slightly so the plugin tightens its analysis to the brighter portions of the image where the monitor sits.
Once the test segment passes, extend the work area to the full clip, render, and check the cut points. The correction should hold steady across the edit because the monitor’s refresh rate is constant — the plugin is not fighting a variable flicker source. Export a reference file and watch it on a calibrated display away from your edit bay. The roll that haunted the background is gone, and the product reel on the screen behind the subject plays cleanly for the first time.
Apple Silicon shaves the long render waits away
The jump to native Apple Silicon support in recent updates means the days of running the plugin through Rosetta are behind you. On an M1 Max or M2 Ultra machine, a sixty-second 4K clip analyzes in roughly the time it takes to make a coffee rather than the time it takes to drink one. The preset system also received a quiet overhaul in the 2.1.x cycle — the LED preset now handles the irregular pulse patterns of cheap dimmer circuits far better than earlier versions, which sometimes interpreted a dimmed LED’s erratic waveform as multiple flicker sources and overcorrected into a subtle strobe of its own.
For editors who work with OpenFX hosts like DaVinci Resolve, the plugin’s frame-analysis window now respects the timeline resolution rather than defaulting to the source clip resolution, which eliminates a scaling mismatch that occasionally produced a one-pixel offset on the corrected frames. It is a small fix that saves a trip to the inspector to nudge the clip position by a fraction — the kind of thing you stop noticing once the plugin just works.
- Apple Silicon and Intel support
- Compatible with After Effects, Premiere Pro, Final Cut Pro, DaVinci Resolve and other major hosts