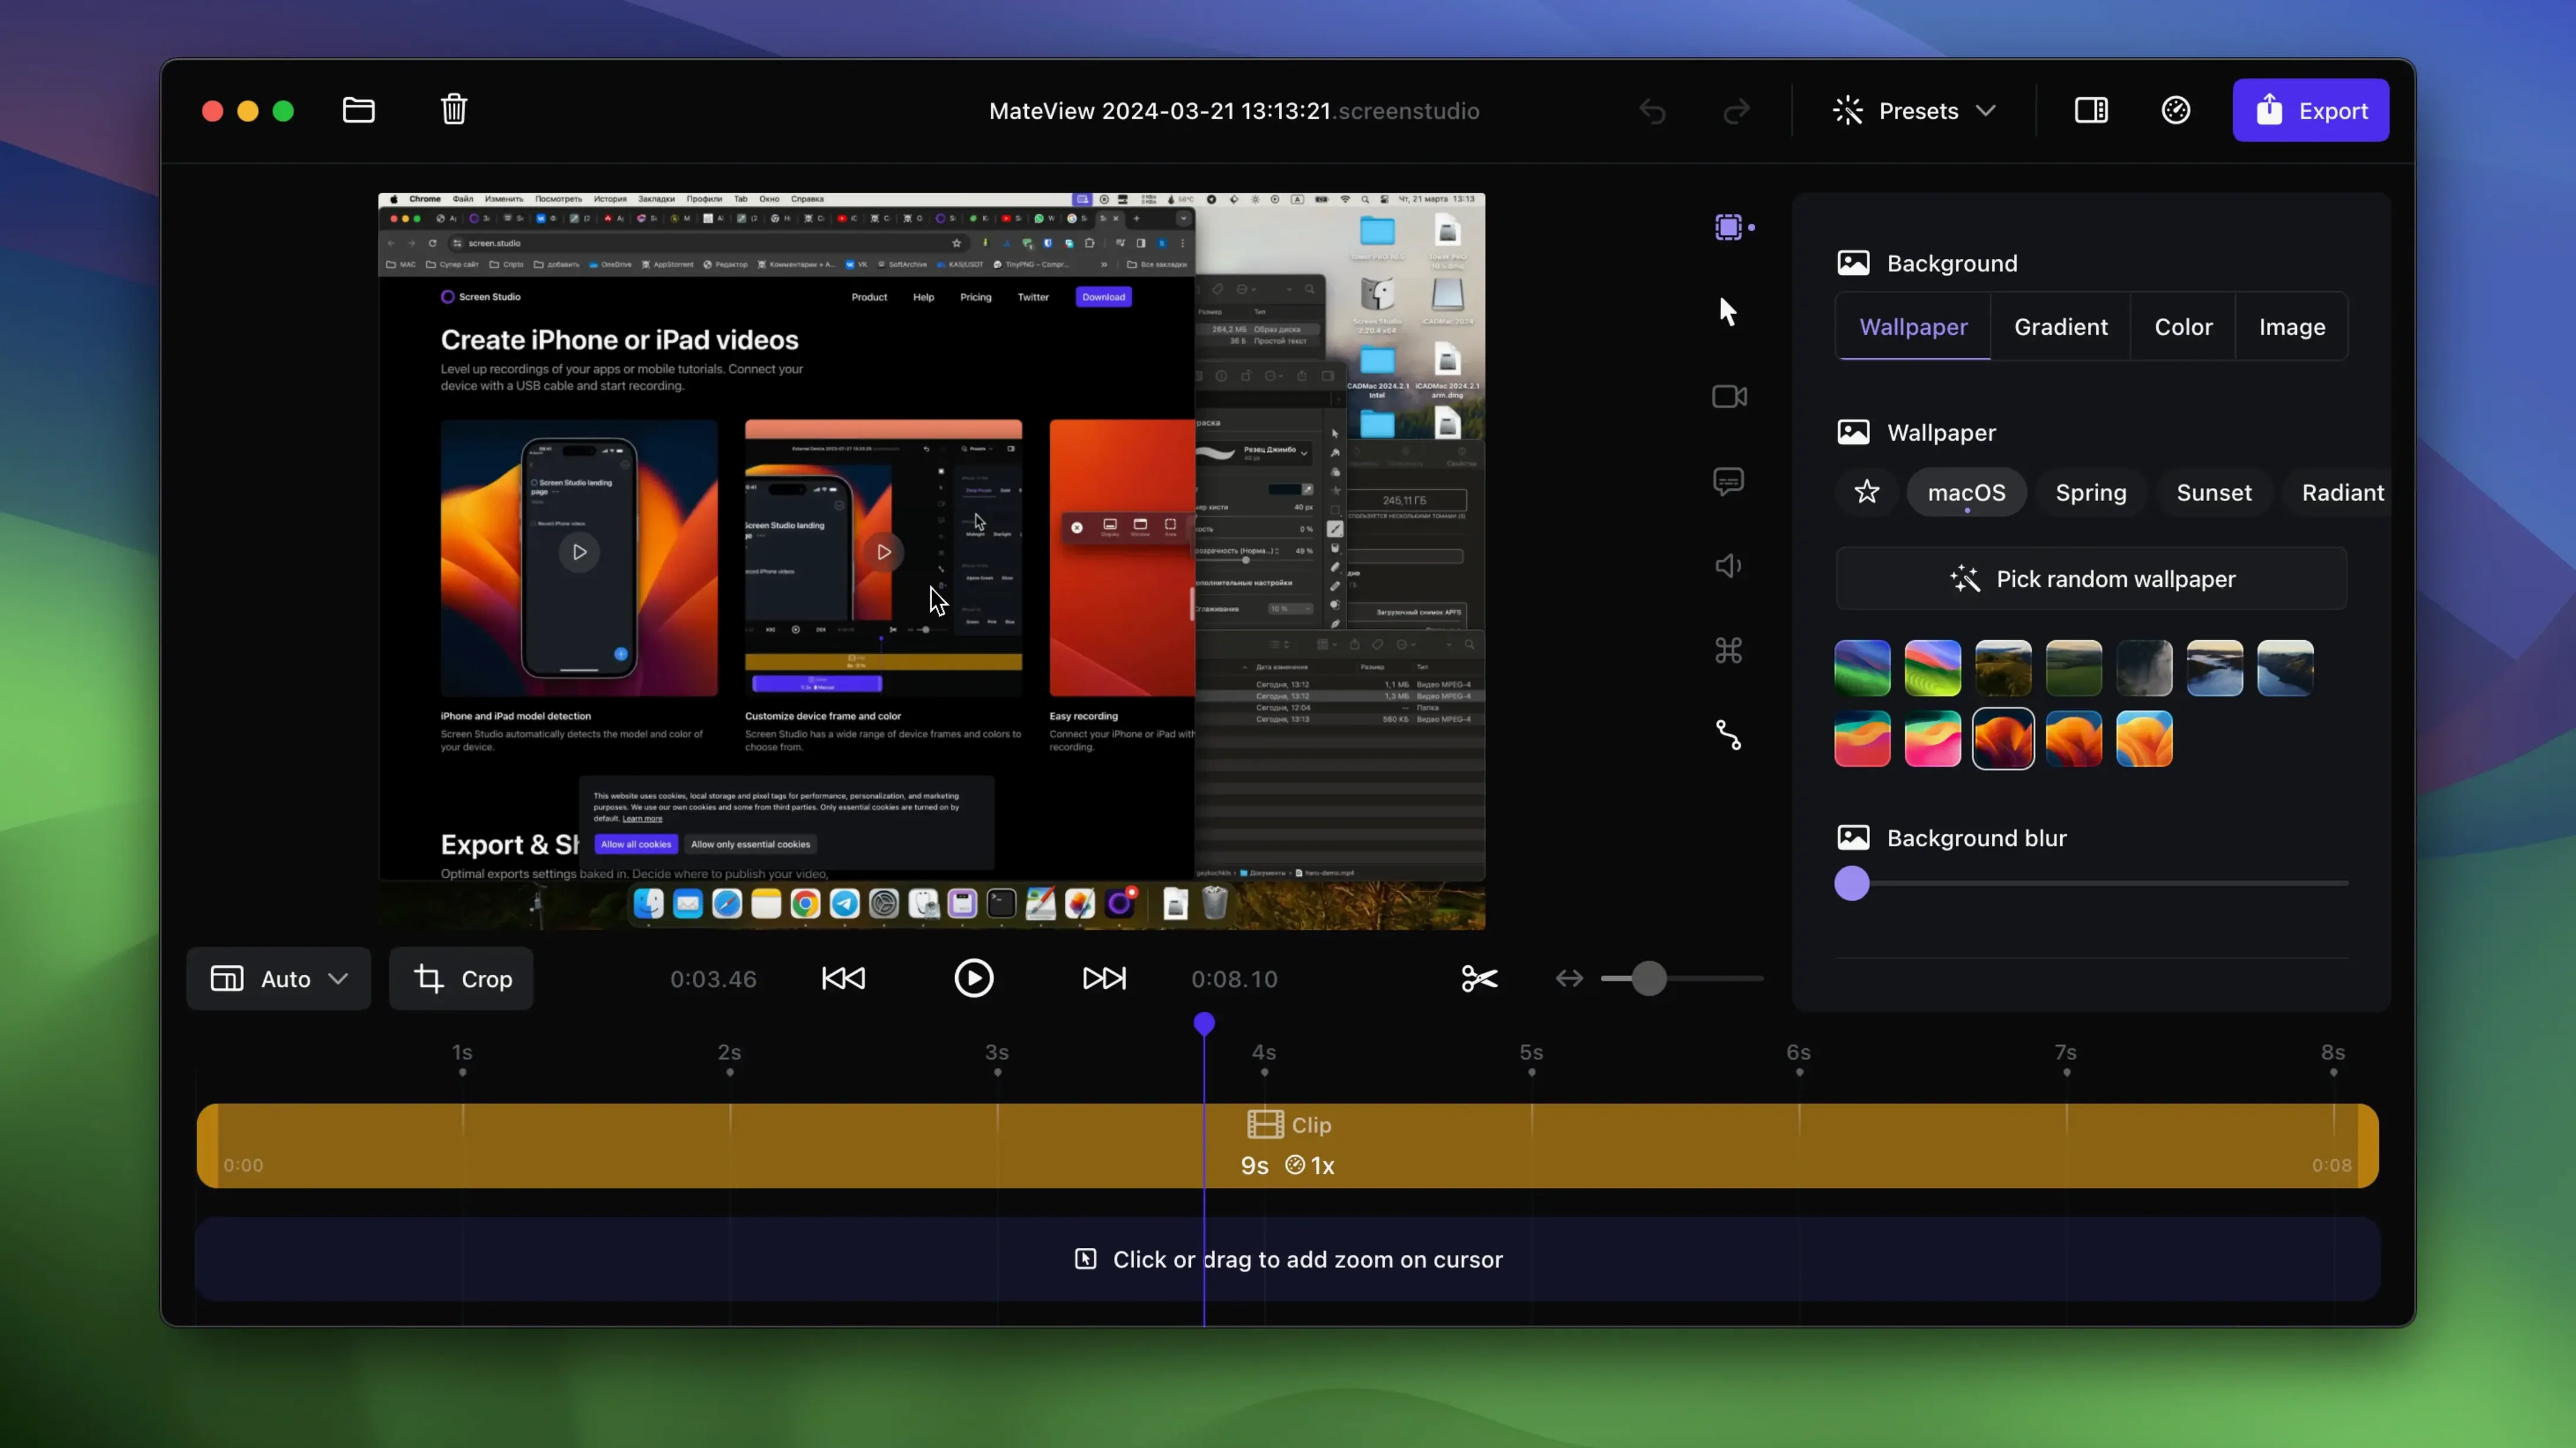
If you have ever watched a polished product demo and wondered how the cursor glides so smoothly while the view zooms in on exactly the right button, that effect rarely comes from manual editing. It is the kind of automation Screen Studio was built around. The application watches your actions and decides where the viewer should look, then lets you fine-tune those decisions afterward.
Drag-to-edit zooms and automatic cursor smoothing
- Will the recording feel alive without hours of keyframing? Zoom changes are editable by dragging them onto the timeline, and the app smooths cursor motion automatically. You can also display keyboard shortcuts in the video and loop the pointer back to its starting position near the end.
- Does it work with my setup? It is a native macOS application, so Windows is out. It runs on macOS 13 or later, on both Intel and Apple Silicon machines.
- What about vertical formats and transcripts? Exporting vertically is built in, with scaling adjusted for that format. A transcript can be generated locally on the computer, without sending audio to a server.
When you record an iPhone or iPad screen, the app detects the device model and color automatically. Background, spacing, shadow, and padding can all be changed to match the feel of a project, which makes it easy to keep a consistent look across a series of short videos.
Record throwaway clips to study the auto-zoom behavior
Install it, open it, and resist the urge to record something public right away. The first forty minutes are better spent making throwaway clips—open System Settings, scroll through Finder, drag a few windows around—then watching how the automatic zoom behaves. You will notice that Screen Studio tends to punch in on clicks and text entry, and the rhythm of those moves is something you learn to anticipate. Once you can predict where a zoom will land, you start clicking with more deliberate pauses, which makes the raw recording cleaner before you touch the timeline.
A practical thing: set the desktop to hide icons during recording on day one. The toggle is in preferences and it saves you from cropping out a messy Desktop folder later. Also, if you plan to use the selfie overlay, record thirty seconds of test footage to check how the automatic size reduction looks against your window spacing. The overlay shrinks when the screen content demands attention, but the threshold is not configurable, so you want to know when it will happen before you commit to a full take.
For anyone who grabbed the screen studio download specifically for device recordings, plug in your iPhone or iPad on the first afternoon and let the app detect it. The model and color detection is instant, and seeing how the device bezel renders in a test export gives you a template you can reuse across projects. Save that test as a preset if the framing looks right.
Before you install: the quiet concerns
People often ask whether the local transcript feature means their audio leaves the machine. It does not—generation happens entirely on the Mac, and the model runs offline. That matters when you are recording internal build walkthroughs or client calls where you promised confidentiality. Another frequent question is whether the app phones home during exports. It does not require an internet connection to render a video, though the shareable link feature obviously needs one to upload.
Some wonder if screen studio cracked versions floating around forums are worth the gamble. A Screen Studio crack might bypass the activation check, and you can still access the transcript model updates and export profile refinements if you set up manual update workflows through the app's resource folders. The app updates frequently enough that a Screen Studio crack for Mac tends to drift out of sync with macOS point releases, so keeping a backup of your last stable configuration before each OS update is a smooth way to stay running. The package people actually need is the one that stays current.
There is also the question of whether the automatic zoom feels gimmicky after a few videos. It does not, provided you treat the initial pass as a rough cut. Dragging zoom changes onto the timeline is fast, and deleting a zoom that felt too aggressive takes one keystroke. The automation does maybe seventy percent of the framing work; the rest is taste, and the timeline tools give you that control without dialling in keyframes from scratch.
An eight-minute Figma walkthrough with voiceover and system audio
Consider someone who teaches Figma via short video lessons. She records her screen for eight minutes, walking through a component variant setup, with system audio capturing the clicks and her microphone picking up a voiceover. Before Screen Studio, she spent twenty minutes per video manually adding zooms to highlight property panel changes—tedious work that made her dread recording days.
Now she records the full session in one take, knowing the cursor smoothing will hide the slight shakiness she has when pointing at small UI elements. After stopping the recording, she drags the zoom markers to linger a beat longer on the auto-layout settings, trims a dead section where she was thinking, and enables keyboard shortcut display so students can see the modifier keys she presses. The transcript generates while she writes the lesson notes, and she copies a shareable link into her curriculum doc rather than uploading a large file. The whole post-production is under five minutes, and the vertical export option means the same recording works for an Instagram Reel without re-framing manually. This is where the tool shifts from recorder to editing assistant—the part she used to do by hand is now a series of drag-and-drop adjustments on a timeline that already guessed her intent.
Shooting a feature launch with device recording and vertical export
Mac users who record at least three videos a week are the ones who notice the time savings compound. Product marketers building a feature launch sequence will use the device recording and vertical export together, because shooting an iPhone app demo natively and exporting it in 9:16 without intermediate scaling steps cuts a full export pass from their workflow.
Customer success people who send personalized walkthroughs benefit from the clipboard copy function: record, trim the start and end, copy to clipboard, paste into an email or Slack thread. No file to manage, no upload to clean up later. Developers writing internal documentation appreciate that the app can record system audio from only selected apps, so a Slack notification ping does not end up in the final video of a terminal session.
Less obvious but equally well served are Mac users who make GIFs for documentation or social replies. The GIF export is direct and the automatic zoom gives a short capture a professional weight it would lack as a static screen recording. A designer sharing a micro-interaction prototype can record three seconds of a hover state, let the zoom tighten on the animation, and export a GIF small enough to embed in a Notion page. That pipeline—record, zoom, GIF—replaces a workflow that used to involve a separate converter and a round of manual cropping.
Walkthrough: recording an iPhone app feature with voiceover
Start by connecting your iPhone via USB. Screen Studio detects it and renders a device frame around the live feed. In the recording panel, select the iPhone as your source, enable microphone input, and disable system audio—no Mac sounds will bleed into the capture. Tap through the feature once slowly to check framing, then stop and discard the test.
Record the real take. Speak your voiceover as you navigate the app, pausing briefly after each tap to let the automatic zoom settle on the interaction. The app will punch in on each tap target without you needing to mark anything. When you finish, the timeline opens with zoom markers already placed at the tap points. Drag the first marker slightly earlier if the zoom lagged behind a fast transition. Trim the dead air at the start by dragging the clip edge inward.
Open the audio panel and enable voice normalization—it evens out the volume without compressing the natural tone. If your refrigerator hummed in the background, toggle noise removal and listen to a few seconds to confirm it did not clip the highs. With the audio set, switch the export format to vertical, confirm the scaling looks correct in the preview, and render at 4K 60fps. The whole process, from plugging in the device to watching the final export, runs under fifteen minutes once you know the sequence.
If the video is bound for a feedback thread, skip the full export and copy it to the clipboard. Paste it directly into a message. The clipboard copy retains the device frame and zoom edits, so what your colleague sees is the polished version, not a raw screen grab.
- macOS 13 or later
- Intel or Apple Silicon Mac
- Native macOS application
Questions from the booth
No, Screen Studio is a native macOS application only. It requires macOS 13 or later.
Yes, the app can export vertically and automatically adjusts scaling for that format.