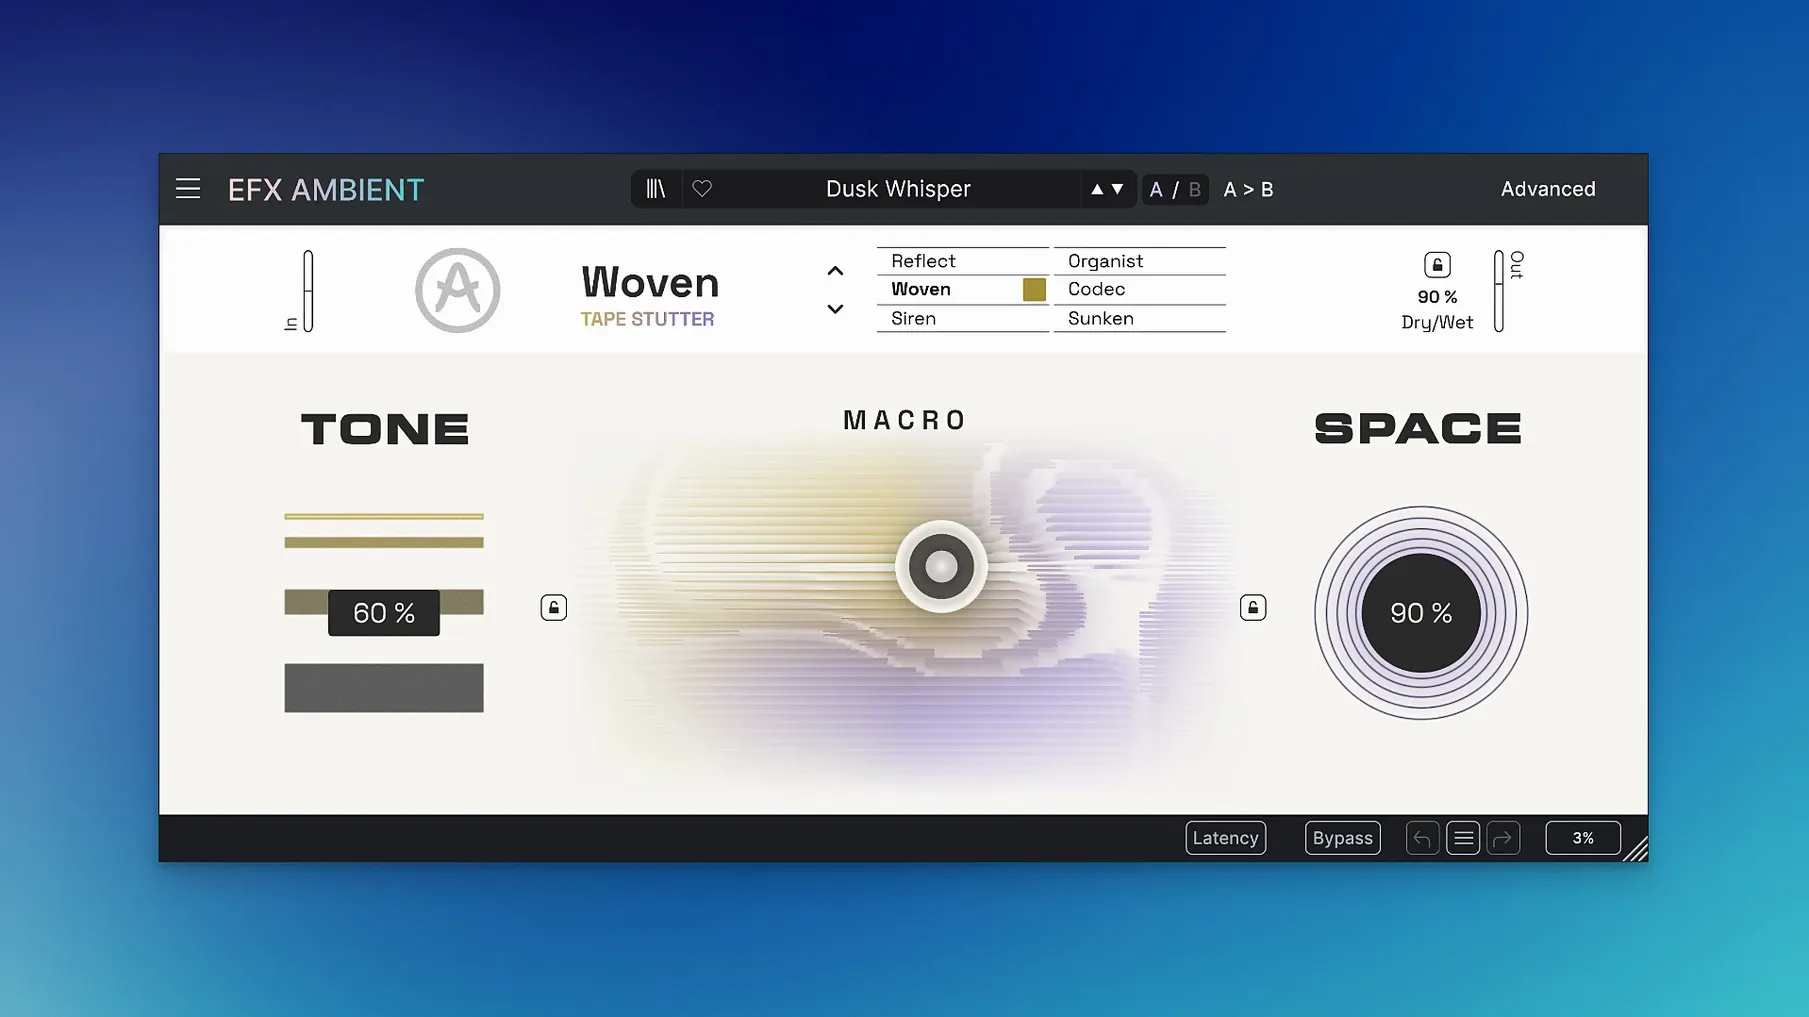
Efx AMBIENT picks up where the granular textures of Fragments leave off, trading microscopic particle clouds for vast, evolving spaces built from spectral processing and feedback delay networks.
Plug-in formats — VST, AU, AAX, running in a 64-bit Universal Binary that covers Intel and Apple Silicon Macs from macOS 11.0 onward.
Host compatibility — works inside any DAW that supports the above formats: Logic Pro, Ableton Live, Cubase, Pro Tools, Reaper, and others.
Operating modes — six distinct signal paths, each routing audio through a different combination of pitch shifting, diffusion, filtering, and reverberant networks. Some modes lean toward subtle spatial widening; others tear the source material into long, dissonant trails.
Core processing — spectral processing isolates and reshapes frequency bands independently, while Feedback Delay Networks layer multiple delay lines into dense, room-like reflections that move. The result is less a standard reverb and more a sound design environment where a piano note can become a metallic drift or a voice can stretch into a choral smear.
Control and movement — the 2D Macro maps multiple parameters to a single XY point, so depth, motion, and timbral change happen together with one gesture. A small nudge can shift a static pad into something that breathes.
Where to start in the settings
Open the Advanced panel before you do anything else. The Mode selector sits top-left, and the character of every other control changes depending on which one you pick. Cycling through the six modes on a held chord or a frozen vocal sample tells you more in thirty seconds than reading the manual — some modes bloom into long, low-frequency washes, others introduce pitch artefacts that feel closer to a shifted tape loop than a reverb.
After you settle on a mode, pull the Dry/Wet mix down to about forty percent and bring the Motion knob up slowly. Motion controls how aggressively the feedback networks shift over time, and at its default zero position the effect can sound static in a way that isn't immediately obvious. A value between twenty and forty introduces gentle drift without the seasick pitch wobble that appears past seventy. Save that for transitions.
The 2D Macro deserves immediate mapping. Click the assignment icon, pick three or four parameters that define the sound you're shaping — Depth, Diffusion, and the mode-specific Timbre slider work well together — and drag them across the X or Y axis. You can record the macro movement as automation in your DAW later, but setting it up early turns the plugin from a set-it-and-forget-it insert into something you play.
Plugins downstream can throw off its timing
The plugin doesn't report latency to the host automatically. In Logic Pro or Ableton Live, you may notice timing drift if you run Efx AMBIENT on a bus with other latency-inducing plugins downstream. The fix is to enable manual delay compensation in your DAW's track inspector and nudge the track by 1024 or 2048 samples — the exact figure depends on your buffer size and the active mode, so test with a percussive transient and adjust until the flam disappears.
On Apple Silicon machines running older AU hosts, the plugin occasionally loads with a blank interface. This is a known issue with the initial release. Restarting the DAW usually resolves it, but a faster workaround is to insert the VST3 version instead of the Audio Unit — it doesn't share the same windowing bug.
High Diffusion settings combined with the Reverse mode can produce a sharp volume spike when playback stops suddenly, especially on material with strong low-end content. A brick-wall limiter after the plugin is not paranoia; it's sensible gain staging. Keep the limiter's ceiling at -0.3 dB and set the threshold just high enough to catch those spikes without clamping the tail.
Building a cinematic pad from a single piano strike
Start with a dry recording of a single mid-register piano note, sustain pedal down, recorded close-miked with no room tone. Trim the transient so the attack remains but the first forty milliseconds of hammer noise are intact — you want the strike for texture, not the ring-out. Insert Efx AMBIENT on the audio track and switch to the Diffusion mode, which smears the harmonic content across time without obvious pitch artefacts.
Set Dry/Wet to one hundred percent wet. Bring Depth to roughly sixty percent and Diffusion to eighty. At this point the piano note sounds like it's being heard through a thick warehouse wall — the fundamental is present but softened, and the harmonics start to overlap into a chord-like smear. Now open the Advanced panel and increase the Feedback parameter until the tail holds for eight to ten seconds. You'll hear the metallic overtones of the hammer strike sustain far longer than they do naturally, turning the attack into part of the pad.
Route the track output to a new bus, add a gentle low-pass filter rolling off above 2 kHz, and insert a separate instance of Efx AMBIENT on the bus set to the Pitch Shift mode with a subtle +7 semitone shift and low mix. The pitch-shifted layer sits behind the main pad like an overtone series that never quite settles. Automate the 2D Macro's Y axis across the length of the cue so the combined sound slowly tilts from dark to bright, then back. The result is a pad that breathes across a two-minute scene without a single synth oscillator involved.
Layer it after a real-world impulse response
Efx AMBIENT works best when it isn't doing all the work alone. A common arrangement pairs it with a convolution reverb loaded with real-world impulse responses — a train station, a stairwell, a forest clearing — placed after the plugin in the signal chain. The convolution gives the tail a recognisable physical space, while AMBIENT supplies the unnatural, shifting texture that holds attention before the reverb decay takes over.
On macOS, you can route audio between applications using BlackHole or Loopback, which opens up a workflow for processing live input from QuickTime playback or browser audio through your DAW. Drop Efx AMBIENT on the input channel, set the mode to Granular, and any found sound you play from a video or a field recording becomes instant source material for a sound design session. The 2D Macro responds well to external MIDI control — map it to a physical fader or a touch surface and you can perform spatial sweeps in real time while recording the output back into your session.
The plugin also pairs naturally with Arturia's own modulation effects further down the chain. A slow phaser from Efx MOTIONS placed after AMBIENT adds a cyclical push-pull to the already shifting feedback networks, and because both plugins expose their core parameters to the host for automation, you can draw complementary curves in your DAW that never repeat exactly the same way twice.
Version 1.0.0 marks the initial release of Efx AMBIENT, introducing six operating modes, spectral processing, Feedback Delay Networks, and the 2D Macro control system.
- macOS 11.0 or later
- Intel or Apple Silicon Mac
- 64-bit host supporting VST, AU, or AAX
Questions from the booth
The Mac build requires macOS 11.0 or later and runs natively on both Intel and Apple Silicon processors.
It ships with VST, AU, and AAX formats in a single 64-bit installer, covering most major DAWs on macOS.