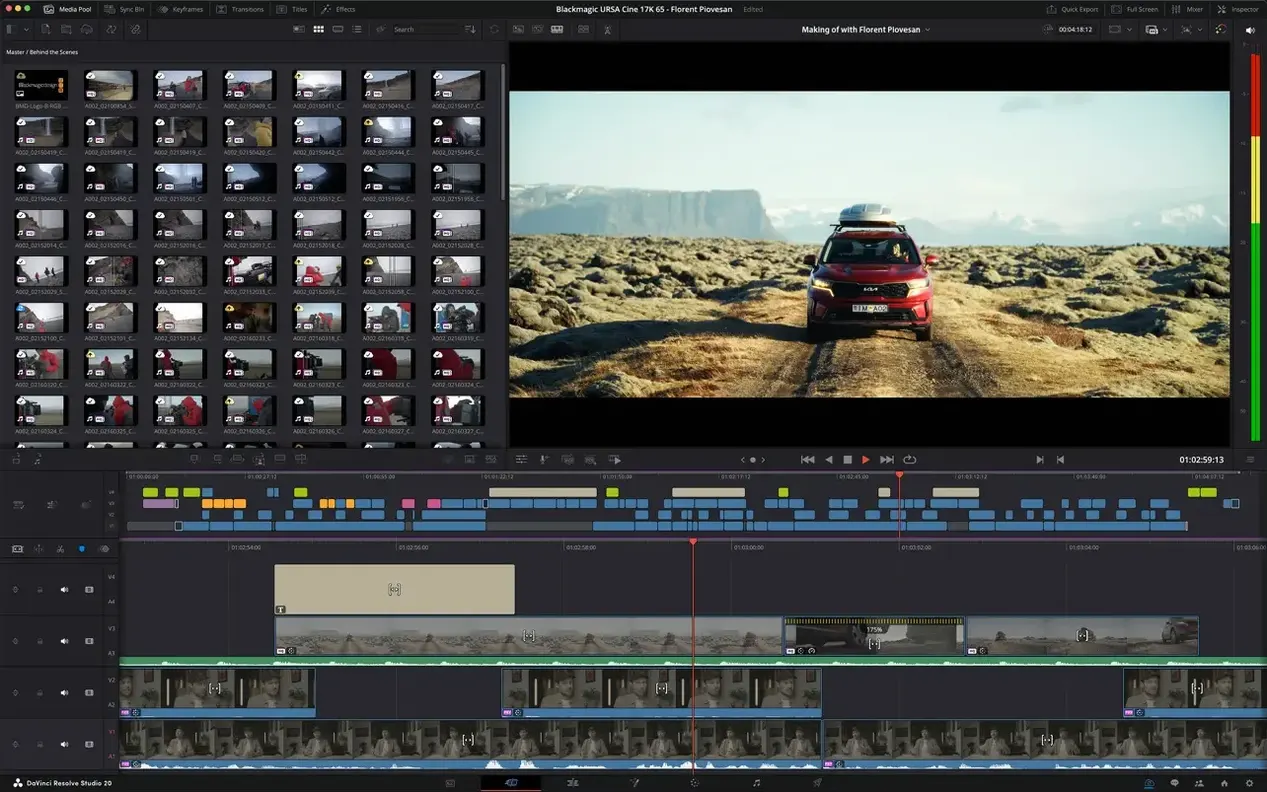
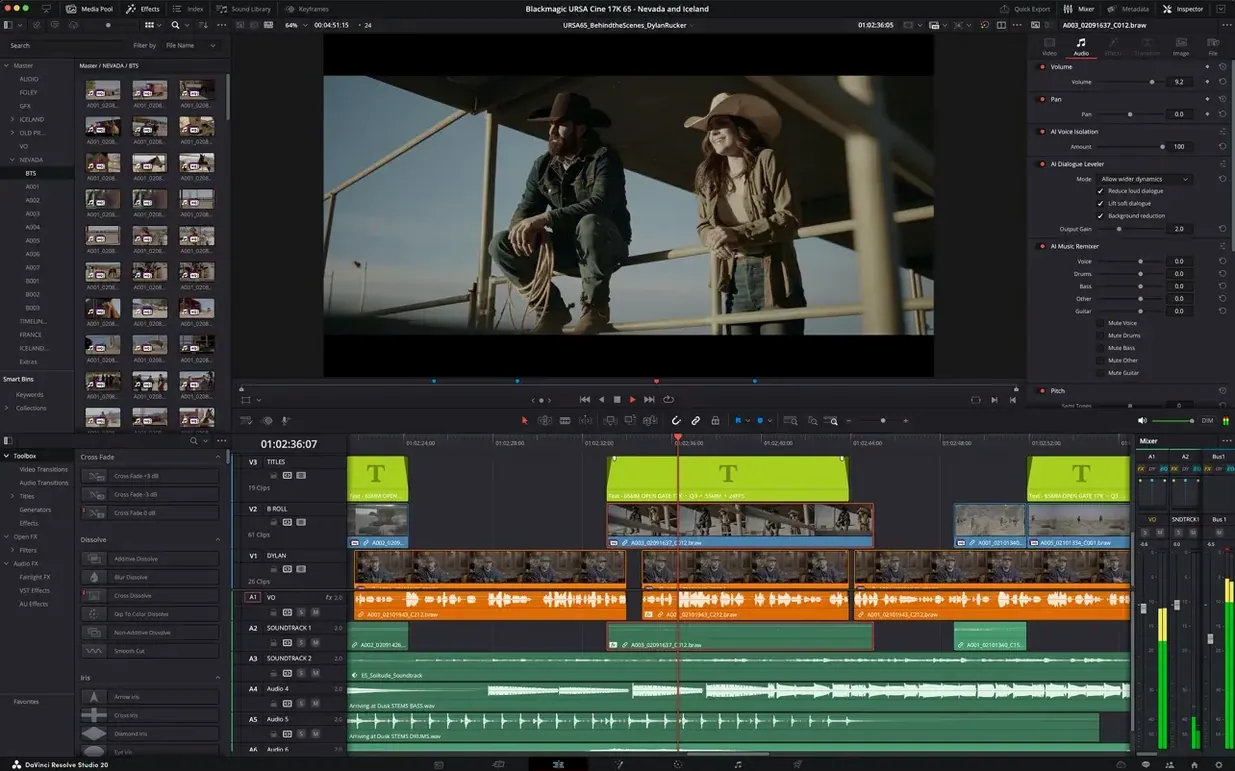
You’ve just offlined a rough cut and the picture lock is still warm. Instead of bouncing an XML over to a separate finishing app, you stay right where you are and open the Color page to start balancing the grade, then drop into Fairlight to clean up the location dialogue—all inside the same project.
How the pages break down
Cut and Edit pages — two ways into the timeline. Cut is built for speed when you’re shaping a story from a mountain of rushes; Edit gives you the full traditional track-based toolset for detailed trimming, slip edits and compound clips.
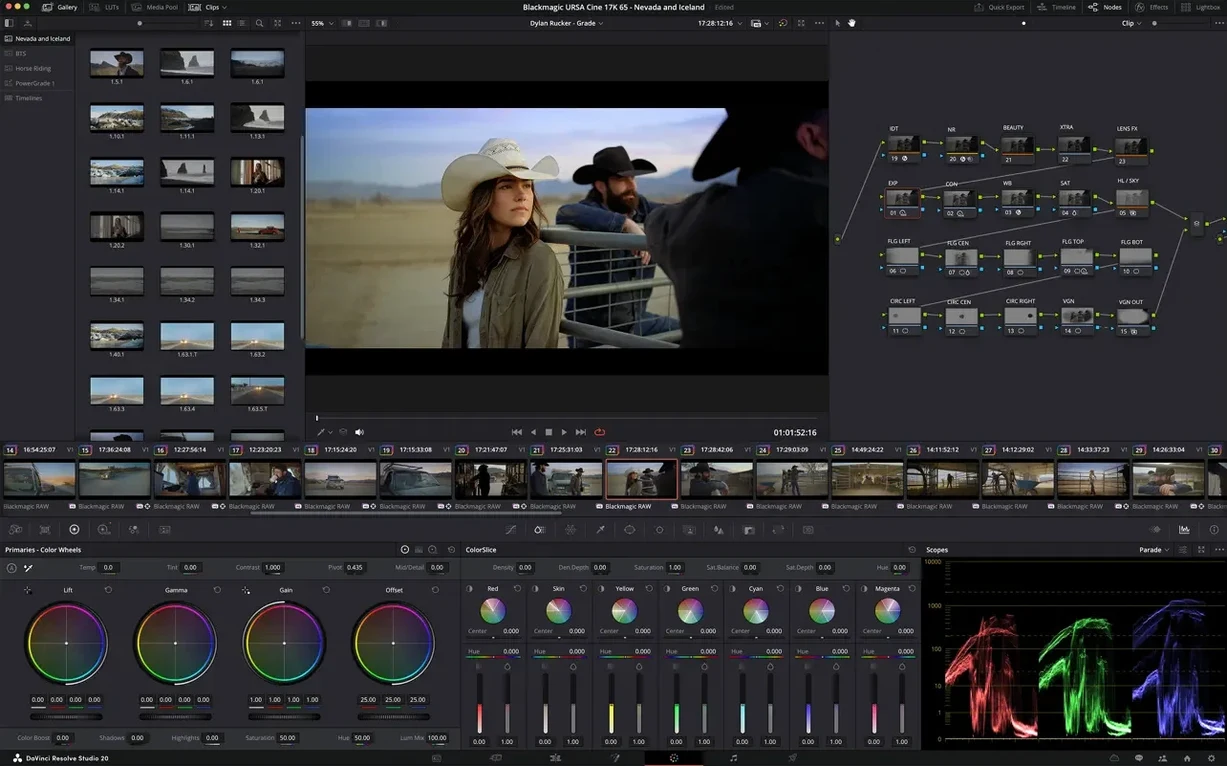
Color page — the reason many people switch. Primary and secondary wheels, curves, qualifiers, tracking windows and a node-based graph that lets you stack corrections without flattening anything. The engine works in 32‑bit floating‑point YRGB, so highlights that blow past broadcast limits can still be pulled back without banding.
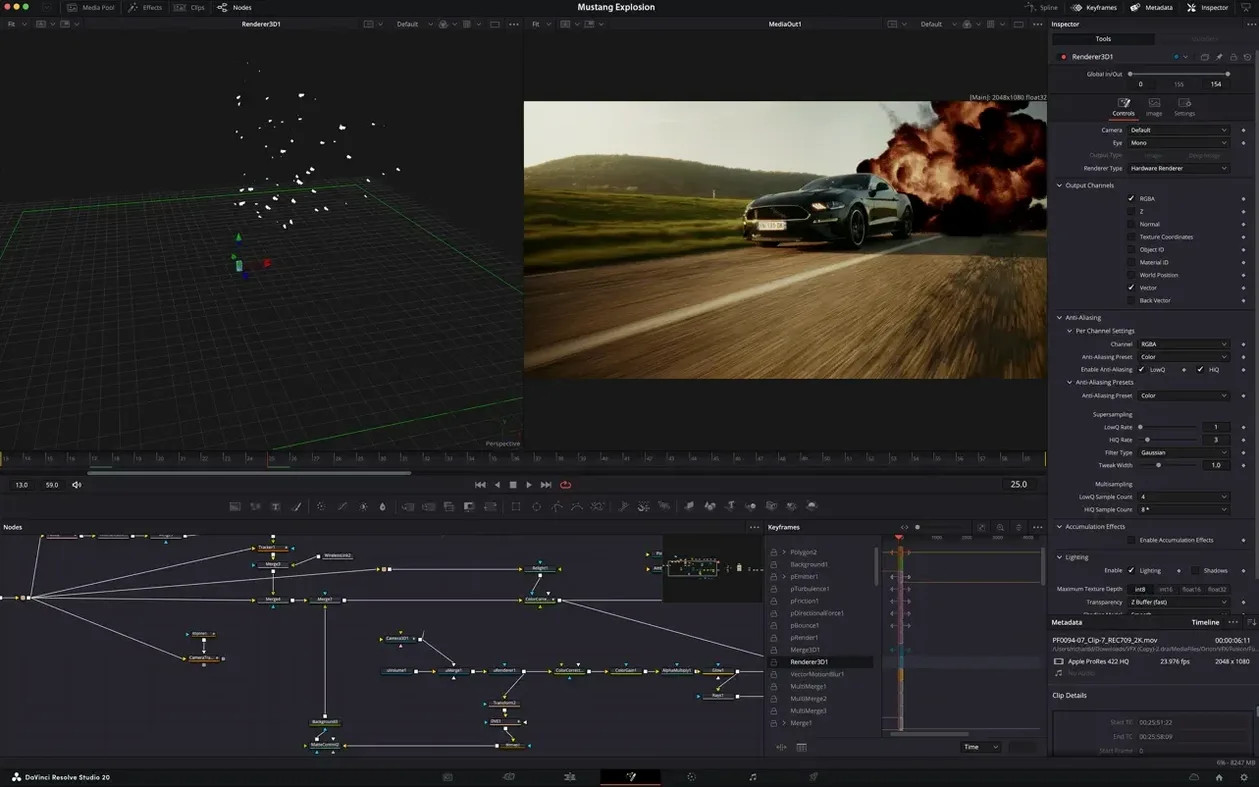
Fusion page — a node‑based compositor for visual effects and motion graphics built into the same timeline. Version 21.1 adds over 25 new Krokodove graphics tools, giving you more ways to generate and manipulate shapes, text and particle systems without leaving Resolve.
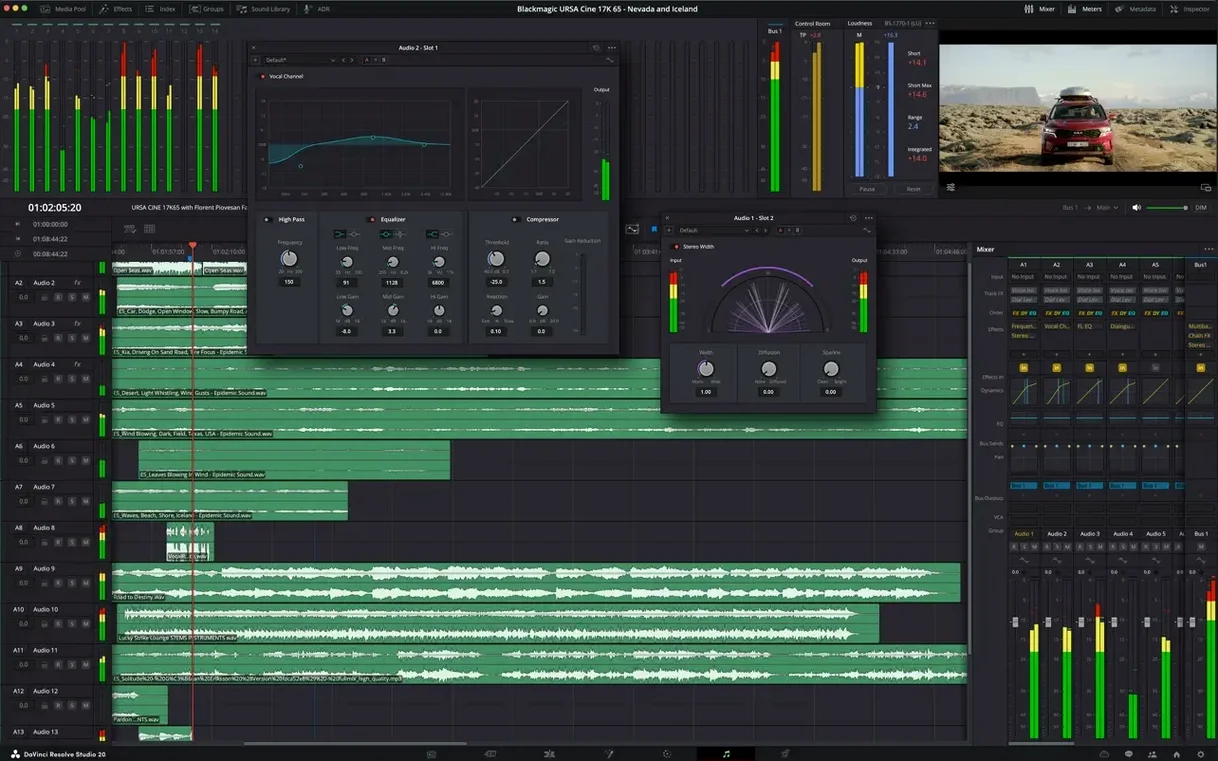
Fairlight page — a full DAW with sample‑accurate editing, a mixer, real‑time EQ and dynamics, and support for plug‑ins. You can record voiceover, mix stems and deliver final audio without opening another application.
Deliver page — where you set up renders. The new AI assistant integration in 21.1 helps organize media and batch renders so you queue up multiple HDR and SDR outputs at once. GPU‑accelerated HTJ2K decoding via Kakadu speeds up playback of JPEG 2000 files on the timeline.
DaVinci Resolve Studio next to Final Cut Pro, Premiere Pro and Avid Media Composer
Put Resolve Studio beside Final Cut Pro and the first thing you notice is how they think about tracks. Final Cut’s magnetic timeline is wonderful for solo editors cutting a short film or a YouTube piece where speed matters more than absolute frame‑by‑frame control. Resolve gives you that same speed on the Cut page—single track, smart insertion, no sync slipping—while keeping a traditional track‑based Edit page one tab away. That split means you can rough out a scene quickly and then switch to a familiar NLE layout when you need to manage twelve dialogue tracks and a temp score.
Adobe Premiere Pro is the closest parallel in philosophy: both are track‑based, both lean on a panel‑heavy interface, and both benefit from strong third‑party plug‑in ecosystems. The difference shows up in the colour work. In Premiere, Lumetri is a filter you apply to a clip; in Resolve, colour is a dedicated room with node‑based logic, qualifiers that actually hold a key on unevenly lit skin, and scopes that update in real time without stuttering. If you finish your own work, that matters. Resolve’s handling of raw formats—Blackmagic RAW, REDCODE, ARRIRAW—feels native rather than bolted on, and the 32‑bit float pipeline means a clipped window in a backlit interview doesn’t turn into a salvage operation in another application.
Next to Avid Media Composer, the conversation shifts. Avid remains the default in scripted drama and broadcast newsrooms because its media management and multi‑user collaboration are battle‑tested across decades. Resolve’s collaboration features have grown genuinely useful—project locking, bin sharing, live timelines—but they still ask for a well‑configured PostgreSQL server and a decent network. For a solo colourist or a small post house handling commercials and documentaries, Resolve’s all‑in‑one approach replaces the Avid‑to‑Symphony‑to‑Pro Tools round‑trip with a single timeline. You lose some of Avid’s trim‑mode precision and script‑sync niceties, but you gain a finishing suite that doesn’t require exporting XMLs and hoping nothing breaks.
6K BRAW playback stays smooth with multiple nodes on Apple Silicon
On Apple Silicon, Resolve Studio feels like it was built there. Playback of 6K BRAW at full resolution stays smooth with a few nodes applied. HEIC decoding now runs through the hardware pipeline, which makes pulling stills from an iPhone shoot trivial. The GPU‑accelerated HTJ2K decoding added in 21.1 means working with DCP‑derived JPEG 2000 files doesn’t choke the timeline anymore—scrubbing feels fluid where it used to stutter.
Memory pressure stays reasonable for most projects. With 16 GB of unified memory you can cut a 4K timeline and do light Fusion work; with 32 GB you stop worrying about it. The real resource draw comes from the Fusion page and noise reduction. Temporal noise reduction in the Color page hits the GPU hard—fans spin up, the UI stays responsive, but render times stretch. It is worth keeping the node graph tidy: an un‑cached stack of blur nodes, keyers, and a film grain overlay will bring even an M2 Max to a crawl. Bypassing nodes you are not actively adjusting is a habit that pays off quickly.
Stability has been solid across 21.x builds. Crashes tend to correlate with third‑party OpenFX plug‑ins that have not updated their Metal support. When a plug‑in causes trouble, Resolve disables it and warns you on restart rather than refusing to open the project. Autosave is frequent and configurable; live‑save means a crash during a grade almost never loses more than a minute of work. On long timelines I have seen the UI redraw lag slightly when switching pages after several hours, but closing and reopening the project clears it without a full restart.
AI assistant now tags bins and lines up batch renders
The AI assistant is the most visible addition. It is not a creative AI that grades or edits for you; it handles the clerical work—tagging bins, suggesting folder structures, lining up batch renders with consistent naming. For a project that spans weeks and generates hundreds of renders for review, having the assistant queue up an HDR pass, a Rec. 709 trim, and an audio‑only MP3 in one step removes a surprising amount of late‑night tedium.
The expanded camera format support on the Photo page closes a gap for anyone who pulls stills from cinema cameras. You can now browse raw stills from a wider set of bodies directly in the media pool and apply grading adjustments before they reach the timeline. The over 25 Krokodove tools in Fusion fill out the motion‑graphics toolkit without needing an external plug‑in: better shape generators, improved text‑path controls, and a few particle presets that make lower‑third builds faster.
The 20 new scripting APIs with built‑in console support open Resolve to automation that was previously awkward. You can write a Python script that pulls clips with a certain keyword, applies a base grade, and places them in a timeline—work that used to require dragging bins for an afternoon. For a small post house that delivers dailies with consistent looks, that scripting layer changes the pace of prep work.
Command-drag a clip to swap shots while keeping all keyframes
Dragging a clip from the media pool while holding Command swaps it into the timeline keeping all in and out points, keyframes, and effects. It is the fastest way to replace a placeholder shot across an entire edit without rebuilding anything. On the Color page, middle‑clicking a node temporarily bypasses it—faster than the checkbox and invisible to anyone watching over your shoulder. Shift‑H brings up the highlight view that shows clipped areas in real time, a habit worth building before you start pulling keys on a window that looked fine on set but is blown out by two stops.
The Cut page has a dedicated speed‑change button that opens a bar right on the clip, no right‑click menus needed. Pull it to 200 %, add a ramp, and you are done. In Fairlight, holding Option while dragging a fader writes automation only for the range you have selected, which spares you from accidentally overwriting a whole reel of mix levels. The Deliver page remembers render presets per project, so a timeline you export weekly for a client review only needs to be queued once; every subsequent export is two clicks.
Another quiet addition: the Media page now lets you sort by codec bitrate, which makes finding proxy‑level clips in a bin full of mixed footage almost instant. And if you work across two displays, hitting Shift‑Command‑F on the Edit page toggles the viewer to fullscreen on the second monitor without entering cinema mode—useful for checking focus on a large panel while the timeline stays visible.
Phone footage drifts less, but long VFR clips still need transcoding
One frequent surprise is audio sync drift when pulling variable‑frame‑rate footage from a phone or screen recording into a constant‑frame‑rate timeline. Resolve handles VFR better than it used to, but long clips still drift. The fix is to transcode the source media to a constant frame rate before import—Shutter Encoder or Resolve’s own media management tool does it quickly, and the sync stays locked.
Another recurring issue is Fusion compositions that play back fine in the Fusion page but stutter on the Edit timeline. This usually means the composition is not cached. Right‑click the Fusion clip and choose Render in Place to bake a temporary render; you can revert it later if you need to tweak nodes. The alternative is to set the Fusion clip’s cache setting to smart in the inspector, which lets Resolve pre‑render frames in the background while you work elsewhere.
Users coming from other NLEs sometimes miss that Resolve defaults to “none” for track‑targeted editing—pressing Delete removes the selected clip, not everything under the playhead. Switching the timeline to “auto‑select” track behaviour in the Edit page’s toolbar brings back the ripple‑delete‑all behaviour if you prefer it. And when a grade from the Color page does not appear on export, the culprit is almost always an accidental bypass on the timeline node or a clip set to “bypass color grades” in the inspector; both are one‑click fixes once you know where to look.
Finally, if Resolve suddenly refuses to play audio after a macOS point update, check the microphone permissions in System Settings. Resolve asks for mic access even for playback monitoring, and a revoked permission silences the entire Fairlight engine until you toggle it back on and restart the application.
- macOS 15 or later
- Apple Silicon or Intel 64-bit processor