You drop a landscape shot onto the canvas and watch the horizon straighten itself — a fraction of a second, no cloud upload, just your Mac's processor doing the work. That local-first approach defines Topaz Photo AI for Mac, a desktop editor that runs its enhancement models entirely on your machine.
Denoise, upscale, and sharpen locally with live slider previews
- Photographers who want AI denoising, upscaling and sharpening without sending files to a server
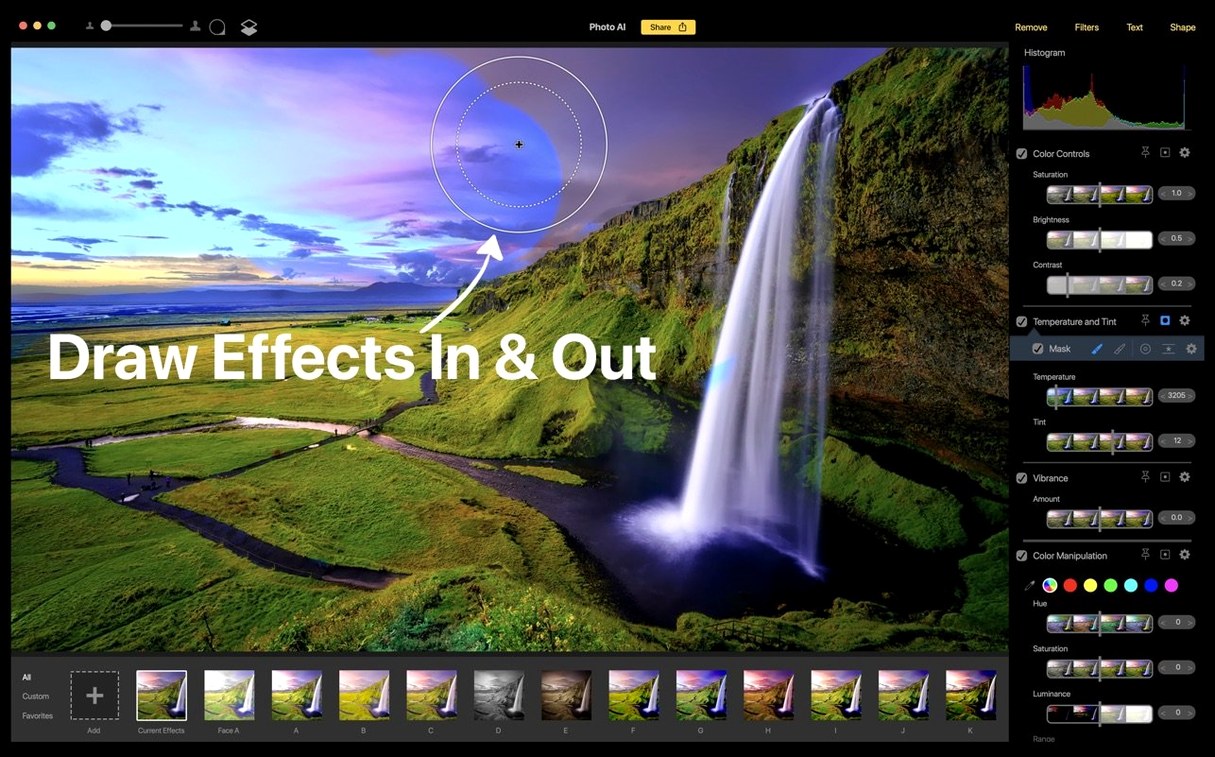
- Non-destructive real-time editing — tweak a slider and see the result immediately, no bake-in
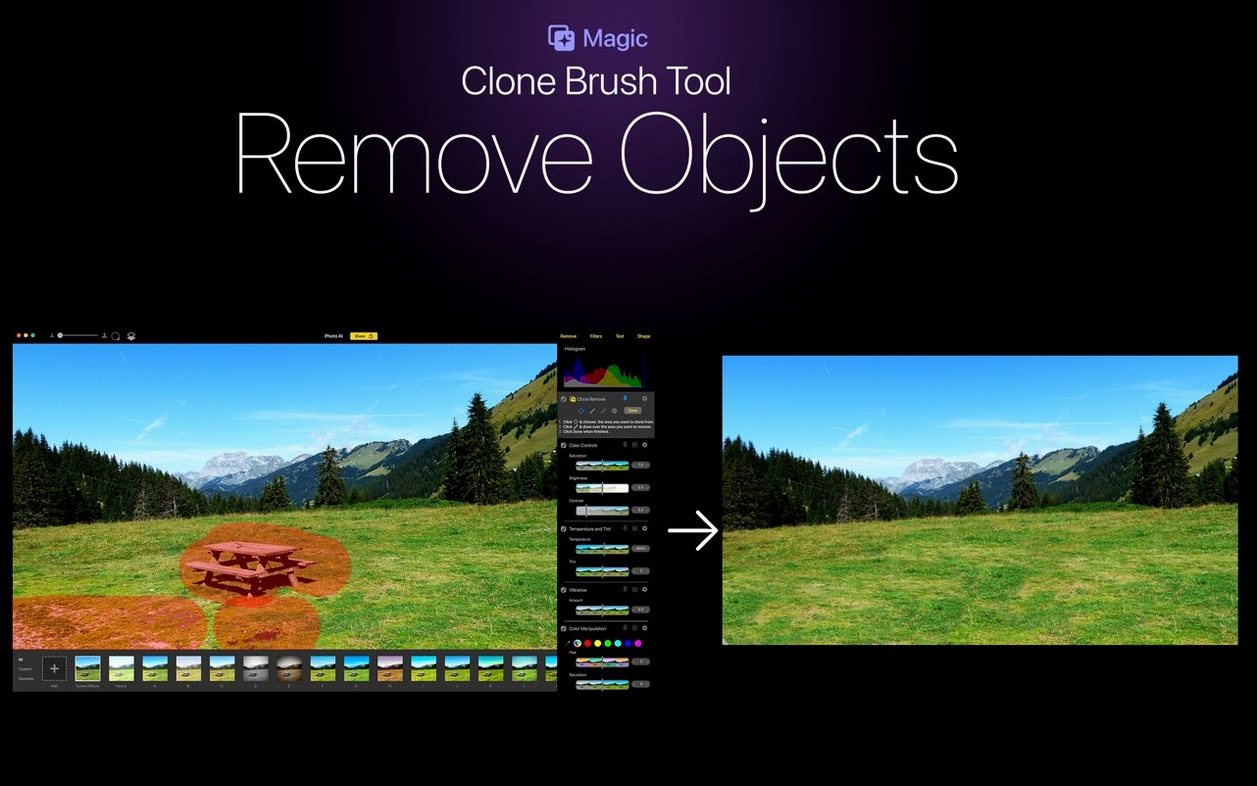
- Removing unwanted objects with the content-aware removal tool
- Layering text and shapes onto images alongside the AI adjustments
- Accessing the full set of Photo AI models plus additional ones exclusive to this app
Runs under Rosetta on Apple Silicon; final v4 standalone release
- Requires macOS 11 and an Intel processor — Apple Silicon Macs run it under Rosetta, not natively
- The interface is available in English and Simplified Chinese
- Photo AI v4.0.4 is the final standalone release of that line
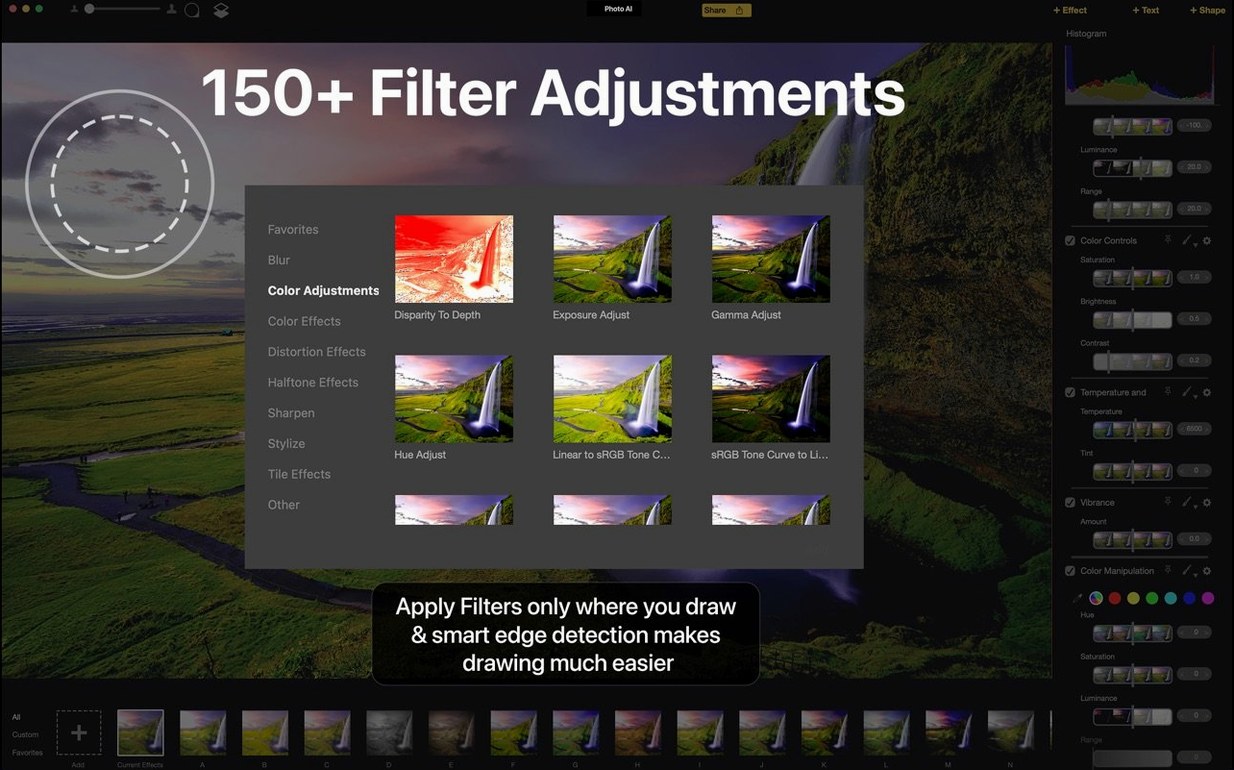
- Over 150 filters and effects means a learning curve if you're new to layered editing
High-ISO concert edits thrive on Intel MacBook Pro hardware
People editing high-ISO concert shots on a MacBook Pro from 2019 sit squarely in the sweet spot. Their machines have the Intel silicon this app expects, and the local processing model means a dimly lit vocalist's face can be cleaned up without waiting for a cloud queue. Wedding photographers who batch-edit receptions also find their stride here — denoising eighty candlelit frames on the hotel Wi-Fi is not a strong plan, but running them through Topaz Photo AI on the laptop's own cores is.
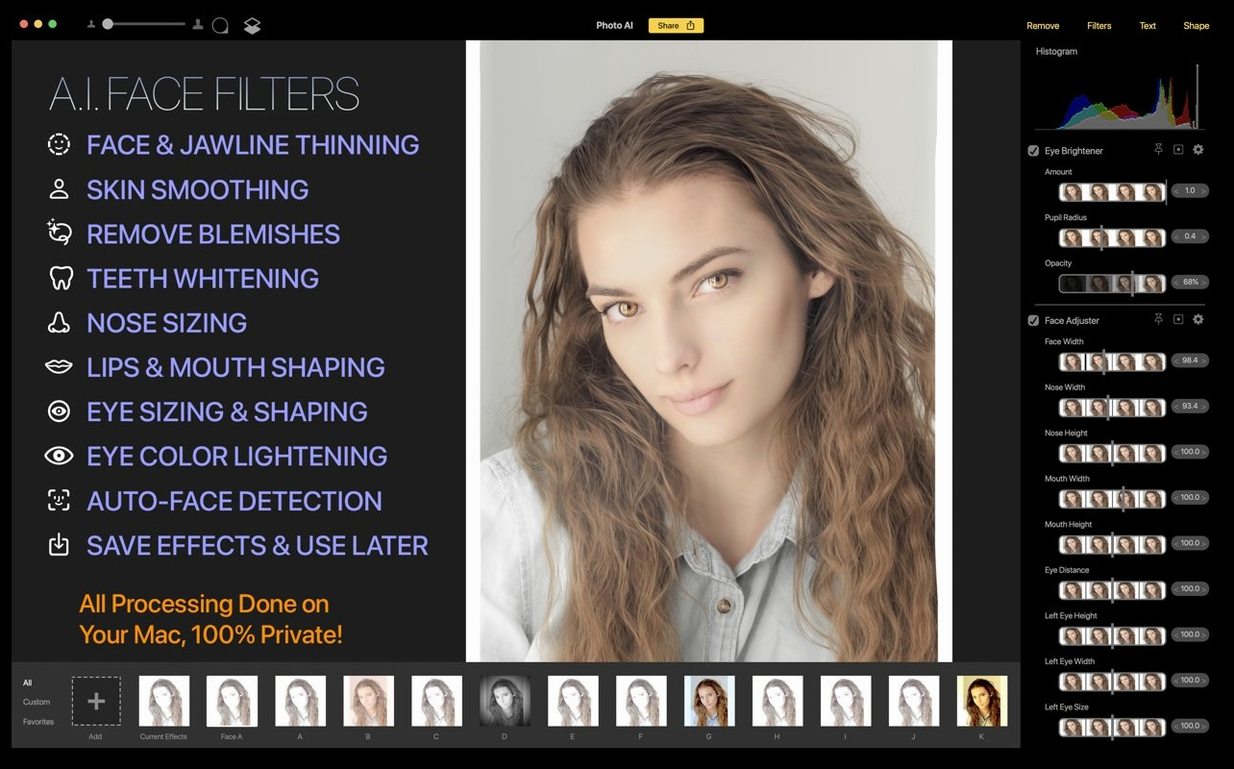
Graphic designers who need to drop a logo onto a product shot, remove a background distraction and sharpen the result in one session get the most from the layered approach. The face filter set appeals to portrait retouchers who want subtle skin smoothing without the plastic sheen that lesser tools produce. Hobbyists with large Raw libraries from older DSLRs — a Nikon D700, a Canon 5D Mark II — often discover that upscaling and sharpening give those twelve-megapixel files a second life on high-resolution displays.
Users who rely heavily on cloud-based editors like Adobe's ecosystem may find the app fits a narrower niche: it solves specific image-quality problems rather than replacing a full workflow. People on Apple Silicon Macs should understand they are running Intel code through Rosetta 2, which works but does not tap the M-series Neural Engine. For short sessions on a handful of images, the translation overhead is barely noticeable. For batch jobs of several hundred Raw files, expect the fans to spin up and the timeline to stretch.
Where people stumble and how to right the ship
The most common frustration is the app refusing to open after installation, presenting a generic "damaged" warning. This is Gatekeeper doing its job on software distributed outside the App Store. The opener script included in the disk image handles this — run it, press Enter in the Terminal window when prompted, and the quarantine flag is cleared. Dragging the app to the Applications folder before running the opener saves a second attempt later.
Sluggish performance on Apple Silicon Macs catches newcomers off guard. Since the app runs as Intel code under Rosetta, a fifteen-second render on a native app might take forty seconds here. Closing other Rosetta processes frees up translation cache memory. Turning off any real-time preview when making large adjustments — denoising a full-resolution Raw file, for instance — keeps the interface responsive. Some users find that disabling the "auto-apply on open" preference prevents the app from churning through every image in a folder before they are ready to work.
The sheer number of filters trips people up. A sharpening preset applied on top of a face filter can exaggerate pores that the skin smoothing just tried to calm. The non-destructive stack is forgiving — reorder the layers, dial back the sharpening mask, and the problem vanishes — but only if you notice the interaction. A good habit is to toggle each layer off and on while zoomed into a critical area. The content-aware removal tool works best on textured backgrounds like grass or gravel; on smooth gradients, it often leaves a visible smudge that requires a second pass with a smaller brush.
Restoring an old family scan, step by step
Start with a high-resolution TIFF scan of the photograph — 600 dpi gives the upscaling model enough data to work with. Open the file in Topaz Photo AI and immediately duplicate the base layer so the original sits untouched at the bottom of the stack.
Apply the denoising filter first. Scanned prints carry a fine grain that is not the same as digital sensor noise; start with the "Low Light" model and pull the strength slider to around forty percent. Zoom into a face and toggle the preview on and off. If eyelashes are turning to mush, back the strength down in ten-percent increments until the texture holds.
With the noise tamed, add a sharpening layer above it. The "Lens Blur" model often works better on scans than the standard sharpening algorithm — it compensates for the slight softness introduced by the scanner's optics. Set the detail recovery slider conservatively; old prints do not have the micro-contrast that digital sensors capture, and pushing too hard creates halos around hair and clothing edges.
Now tackle the physical flaws. Switch to the content-aware removal tool and brush over the crease that runs across the corner of the print. Work in short strokes rather than one long sweep — the algorithm samples from adjacent areas, and short strokes give it cleaner source material. If the repair looks patchy, undo and try a slightly larger brush that includes more of the surrounding texture.
Add a face filter layer for any visible portraits. The default skin smoothing tends to be aggressive on scanned film; pull the "skin texture preservation" slider to about seventy percent so the person still looks like themselves. The eye enhancement sub-filter can brighten irises, but on black-and-white scans it sometimes introduces an unnatural contrast. Disable it and brighten eyes manually with a subtle curves adjustment instead.
Finally, upscale if the scan is destined for a large print. A four-by-six-inch original at 600 dpi upscaled two times produces a file that prints cleanly at eight by twelve. Apply the upscaling as the top layer so it works on the already-cleaned image beneath. Export as a sixteen-bit TIFF to preserve the tonal range for any further editing in another application.
Sits between Raw culling and final color grading
The app occupies a specific slot between Raw developer and final output. A common chain: ingest Raws into a library manager, pick keepers, send the noisy ones through Topaz Photo AI for denoising, then finish colour grading in a dedicated editor. The processed TIFF slots back into the library with metadata intact. This avoids the awkward dance of trying to sharpen inside a Raw developer that does not know what the AI model has already done.
Integration with the Finder is straightforward — the app registers itself for common image formats, so right-clicking a JPEG and choosing "Open With" bypasses the need to launch the app first. Drag-and-drop from a Photos library works if you have set Photos to keep originals on disk rather than in the cloud-optimized format. The non-destructive editing stack saves its state in a sidecar file next to the original, which means you can archive both together and revisit the exact adjustments months later.
Quick Look integration in macOS means you can preview a saved TIFF by tapping the spacebar, but the sidecar file is invisible to Quick Look — you see the processed output, not the layer breakdown. For collaborative work, exporting a flattened copy with layers baked in gives colleagues the final image without requiring them to own the app. The English and Simplified Chinese localizations extend to the filter names and tooltips, so a bilingual team can share a Mac without switching system languages.
It sharpens and denoises, but won't replace your Raw developer
Does this replace my existing photo editor? Not entirely — it replaces or supplements the sharpening, denoising and upscaling modules you currently use elsewhere. You still need a Raw developer for exposure and colour work, and a pixel editor for compositing or heavy retouching. Think of it as a specialist lens in a kit rather than the whole bag.
Will it work on an M1 or M2 Mac? Yes, through Rosetta 2 translation. The app does not ship a universal binary, so you are running Intel code on Apple Silicon. For most single-image edits the performance is acceptable; batch processing tests the patience more noticeably. There is no indication of a native ARM build in this version line.
How does the local processing work for large batches? The app queues images sequentially and uses the CPU and GPU cores available on your Intel Mac. Processing time scales roughly with megapixel count and the number of active filter layers. A twenty-four-megapixel Raw with denoising, sharpening and upscaling enabled might take thirty to sixty seconds on a 2019 Core i7 MacBook Pro. Closing other applications, particularly browsers with many tabs, frees memory and keeps the queue moving.
Is the content-aware removal as capable as a clone stamp? It works differently. The AI removal tool guesses at what belongs behind the object you are removing, sampling from surrounding pixels. On busy textures — foliage, gravel, brickwork — it often succeeds on the first attempt. On smooth gradients or geometric patterns, the clone stamp in a traditional editor gives you more control. Many users run the removal pass here, then open the result elsewhere for manual touch-ups on the tricky areas.
Version 2.1 introduces optional extras directly into the app interface.
- macOS 11 or later
- Intel 64-bit
Questions from the booth
All processing happens locally on your Mac. No image data is uploaded to a server.
Photo AI v4.0.4 is the final version. The current Topaz Photo app includes all those models and continues development.